Canon Tilt-Shift Lenses for Landscapes & Portraits

What Are Tilt-Shift Lenses and Why Are They Important?
Tilt-shift lenses are speciality lenses which enable us, as photographers, to create different effects in our work. Tilt-shift lenses encompass two different types of movement: shift, where the lens is moved parallel to the image sensor (useful for photographing trees, buildings, and also mirrors – more about this below); and tilt, where the plane of focus is tilted relative to the image sensor, which is fantastic for achieving front-to-back sharpness in photographs and is very popular when photographing landscapes.
Large format view cameras have had these movements since the early days of photography. Nikon produced a lens with a shift mechanism in 1962 for their 35mm cameras, and Canon introduced their first tilt-shift lens in 1973 (Canon TS 35mm f2.8 S.S.C). Since then, many camera manufacturers have created tilt-shift lenses for their 35mm SLR and DSLR systems and Canon now has four lenses in its current line-up: the TS-E 17mm f4L, TS-E 24mm f3.5L II, TS-E 50mm f2.8L MACRO, and TS-E 90mm f2.8L MACRO.
These lenses are a lot of fun to use and I found them a great way to explore new creative avenues in my photography.

I was lucky enough to borrow these three lenses from Canon for my recent trip to the Lake District – the TS-E 90mm f2.8L MACRO, TS-E 50mm f2.8L MACRO, and TS-E 24mm f3.5L II.
My Story with Canon Tilt-Shift Lenses
Back in 1999, I travelled to Iceland with my dad on a landscape photography trip. It was one of the early tours with the company Light & Land and was led by landscape photographers Joe Cornish and David Ward. This trip was a turning point for me and one of the most important moments in my journey as a photographer.
Setting off with my dad, I was going for a holiday. I’d been taking and printing black and white photographs since childhood and at that time had a dream of becoming a stage photographer. I practiced on school plays and the university drama society during term time, while my summer holidays were filled with portrait photography at my mother’s nursery school. I’d never given any thought at all to landscapes and, if I’m honest, I wasn’t that interested. But a trip to Iceland with Dad was an amazing opportunity to spend time together so I decided to learn.
It’s no exaggeration to say that trip changed my life. I discovered a deeper love for photography and, learning alongside my dad, my work took on a much greater depth very quickly. David and Joe are incredible teachers and they encouraged my enthusiasm for what would become my future career.
At this point, they were both shooting with 5” x 4” view cameras – complete with dark cloths and transparency film – and I was mesmerised. The process seemed so different, moving the bellows to adjust the lens and producing stunning pictures on the ground glass screen that I was allowed to peek at before they pressed the shutter.
They were using tilt and shift movements creatively on their view cameras to control focus from the front to the back of an image, giving them greater depth of field without using the very smallest apertures and having the associated problems caused by diffraction (which is where, when you stop down to small apertures, the fine detail in images can begin to blur. I found a great article which explains diffraction in greater depth.
Using an SLR, I didn’t have these options, but my curiosity was aroused.
Some years later, when I had established my photography business and was shooting weddings alongside my then boyfriend (now husband) Tom Catchesides, I came across tilt-shift lenses again. At the time we were both members of an American website called the Digital Wedding Forum, and tilt-shift lenses were becoming fashionable in wedding work in the United States. So, I decided to buy one to add a creative element to some of my portraits.
I loved the lens – a Canon EF TS-E 45mm f2.8 – and used it creatively when photographing adults or shooting engagement sessions. I didn’t try to use it with children because it’s a manual focus lens and, using it the way I did for creative effect, I found it quite difficult to focus accurately on the camera I was using at the time. I used it a lot for a couple of years and then, as my business became almost entirely family- and child-based, it got forgotten, stored safely in a camera bag out of sight and out of mind.
Fast forward a number of years and Tom and I planned to join David Ward and Joe Cornish again for a landscape trip to the Lake District. If you are looking for a landscape holiday I can highly recommend David’s landscape photography trips, I always learn so much and come away full of inspiration and enthusiasm.
I thought it was time to look again at tilt-shift lenses, both from a landscape and also a portrait point of view and to see what learning more about how they work from a technical point of view could bring to my creative use of the lenses.
Now I am a Canon ambassador, I’m in the very lucky position to be able to borrow equipment and so, knowing I was heading on this trip, I asked to borrow Canon’s amazing tilt-shift line up: the TS-E 24mm f3.5L II, TS-E 50 mm f2.8L MACRO, and TS-E 90 mm f2.8L MACRO lenses. The idea was that I could learn about how they work in the company of skilled practitioners.

How Do Tilt-Shift Lenses Work and Do We Need To Understand The Science?
So, let’s look at this in a bit more depth: what do tilt-shift lenses do, how do they do it, and do we really need to understand the science to be able to use them effectively?
While my technically-minded mentors will shake their heads, I’m going to say no, we don’t really need to fully understand the scientific details but, as always, it helps if we know the basics.
I’m going to do my best to explain it and huge apologies if the science, and the diagrams, are a bit sketchy.
Let’s start with the basics. When we compose a picture, the plane of focus is moved by moving the lens relative to the image sensor. In most camera lenses, this front to back movement happens inside the barrel but if you think back to the extending telescopes you may have had as a child you get the idea. Extending the telescope moves the lens away from the sensor and we can focus on things further away (i.e. the plane of focus has been moved further from the sensor). In a telescope, as in a normal camera lens, the sensor and the plane of focus are always perfectly parallel.
A good way to think of the plane of focus is as an infinite slice of glass parallel to your camera that stretches down to the ground and up to the sky. On this plane of focus, everything is sharp. It can be a very thin piece of glass at a wide aperture such f1.2 or, by decreasing the aperture, we can extend the thickness of the piece of glass creating a wider depth of field (such as at f16). It’s flat though and always parallel to the image sensor.

How the plane of focus looks with a normal lens.
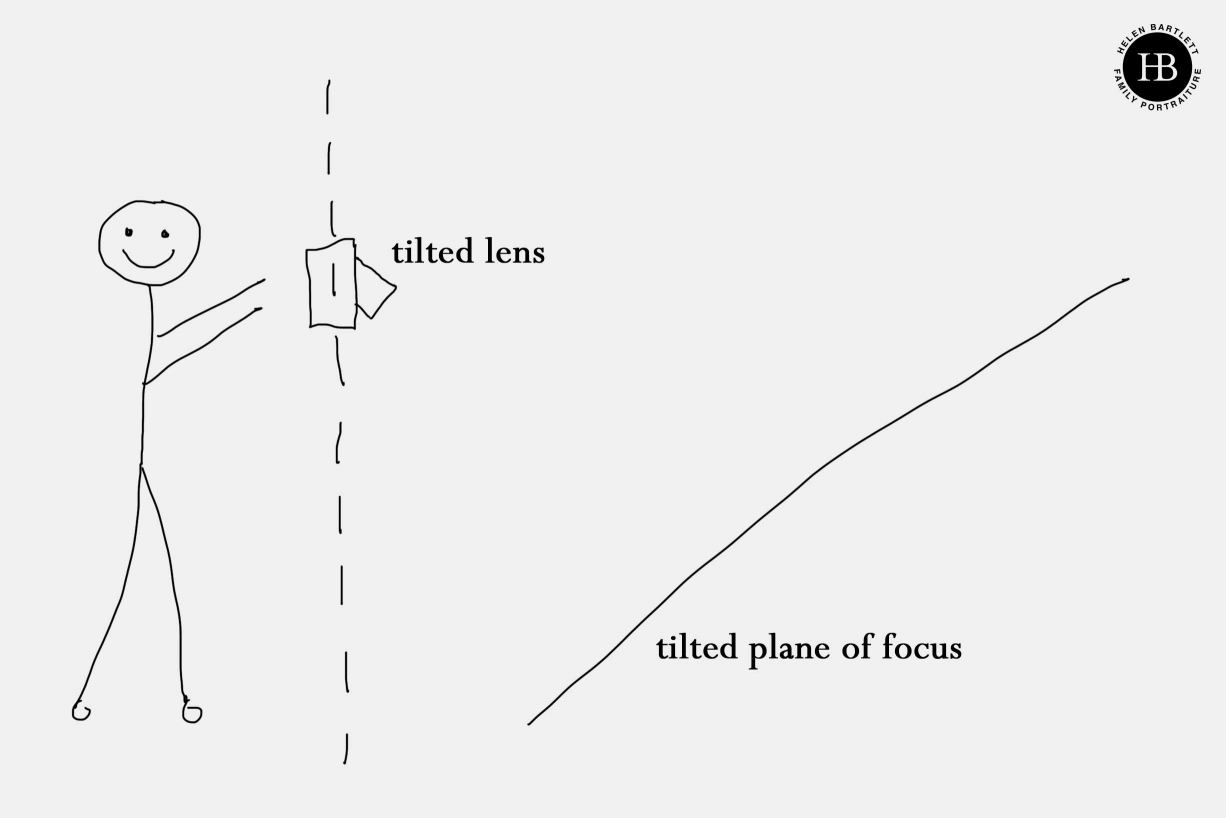
How the plane of focus looks with a tilted lens.

This is how a lens looks at full downwards tilt.
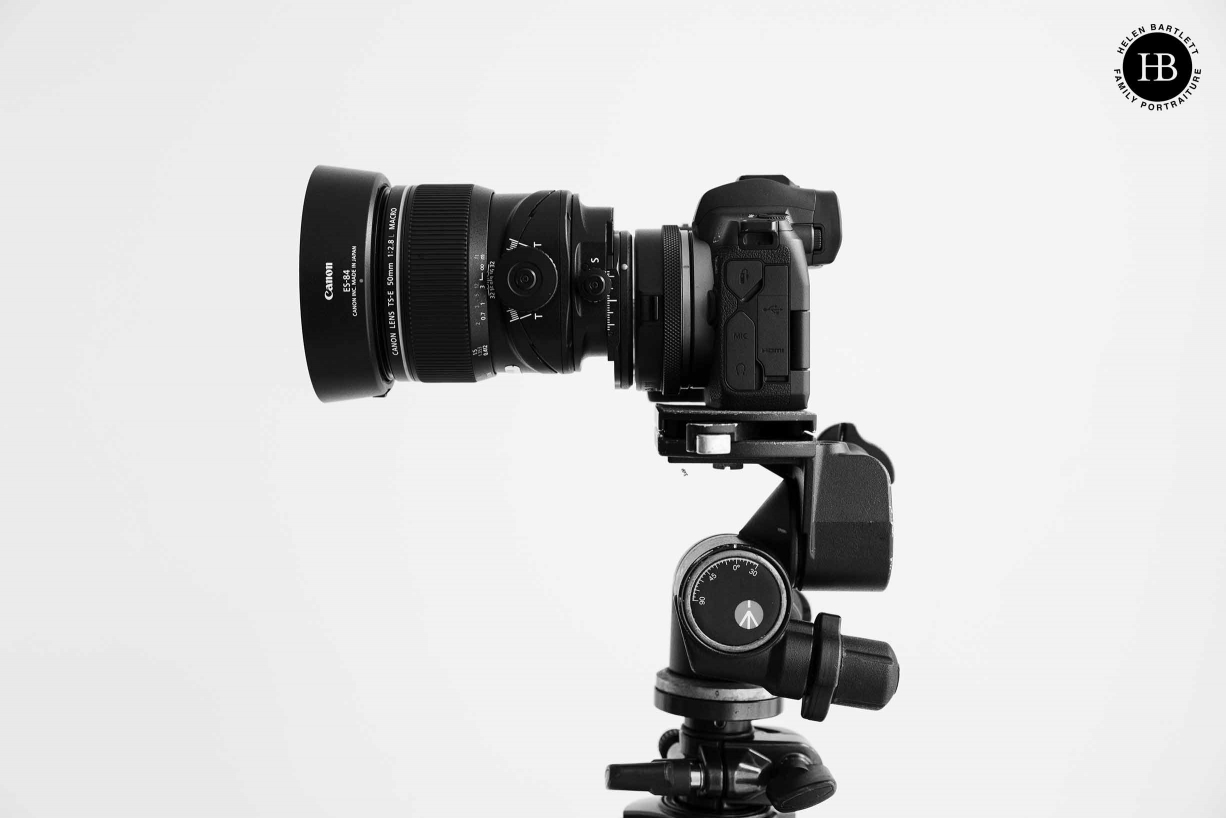
This is how a lens looks with a full upward shift.
Tilt
All good so far? Let’s move onto tilt.
Tilting a lens changes the angle of the front element relative to the sensor, and the plane of focus tilts with it. How this all works is governed by the Scheimpflug principle, which I can’t pronounce and barely understand. There are a lot of articles that explain it, but they make my brain melt so I’m going to move on from the science. As always. Tim Parkin in On Landscape explains it best but that’s behind a paywall so if you don’t subscribe to his excellent magazine have a look on Wikipedia.
But, regardless of the science, what does tilting the lens mean in practice? It means that we can put the plane of focus at a different angle and so, if our landscape picture starts near our feet and extends off into the distance, we can achieve focus throughout the picture without stopping down our lenses further than we would wish.
Below are two pictures of some stones. One is shot at f2.8, and you can see the plane of focus is on the front stone and the ones behind are blurred due to shallow depth of field. The second picture uses tilt on the lens, the plane of focus is now runs along the ground from the front to the back of the picture (and thank you to Tom Catchesides for the images, I forgot to take one to demonstrate this).

Tom’s two pictures of stones demonstrate the difference between a shallow depth of field on a normal lens on the left and the front to back focus with a tilt-shift on the right
Shifting the Lens
Shifting the lens is easier to understand. Here we are moving the lens up, down, left, or right, but keeping it parallel to the image sensor. The effect is to make it seem like you’ve moved the whole camera much further in that direction.
For example, think about taking a picture of a mirror where you want the mirror to be squarely in the middle of your composition. You and your camera will appear in the reflection. By shifting the lens, you can position the camera to the side of the mirror but make it looklike the camera was positioned directly in front of the mirror. Clever stuff.
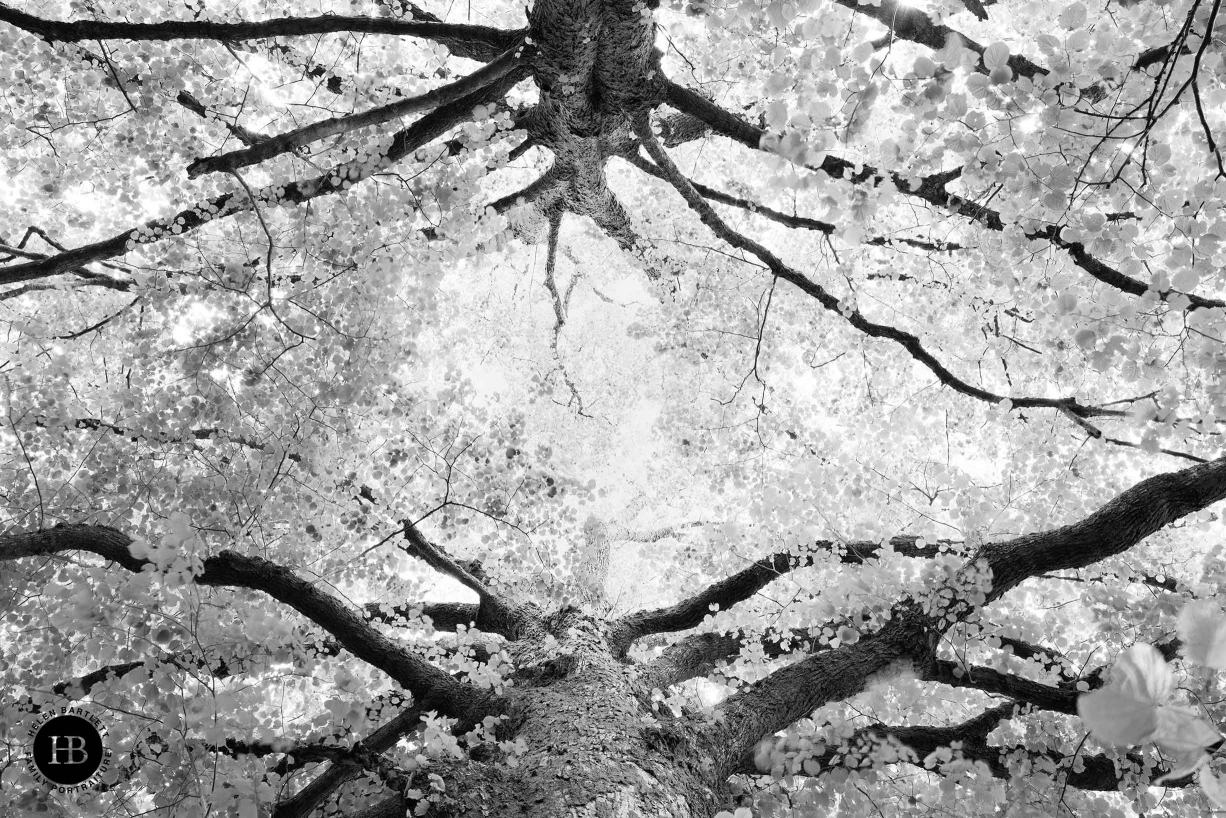
Shift is also frequently used in architectural photography where, by shifting the lens up, we do not need to angle the camera up to capture the top of a building. This means we can avoid the converging verticals which would occur if we pointed our camera upwards. Below are two pictures of trees. On the left, the camera is angled up towards the trees and we can see how they converge towards the top of the frame. On the right, the lens is shifted upwards and the trees remain straight.
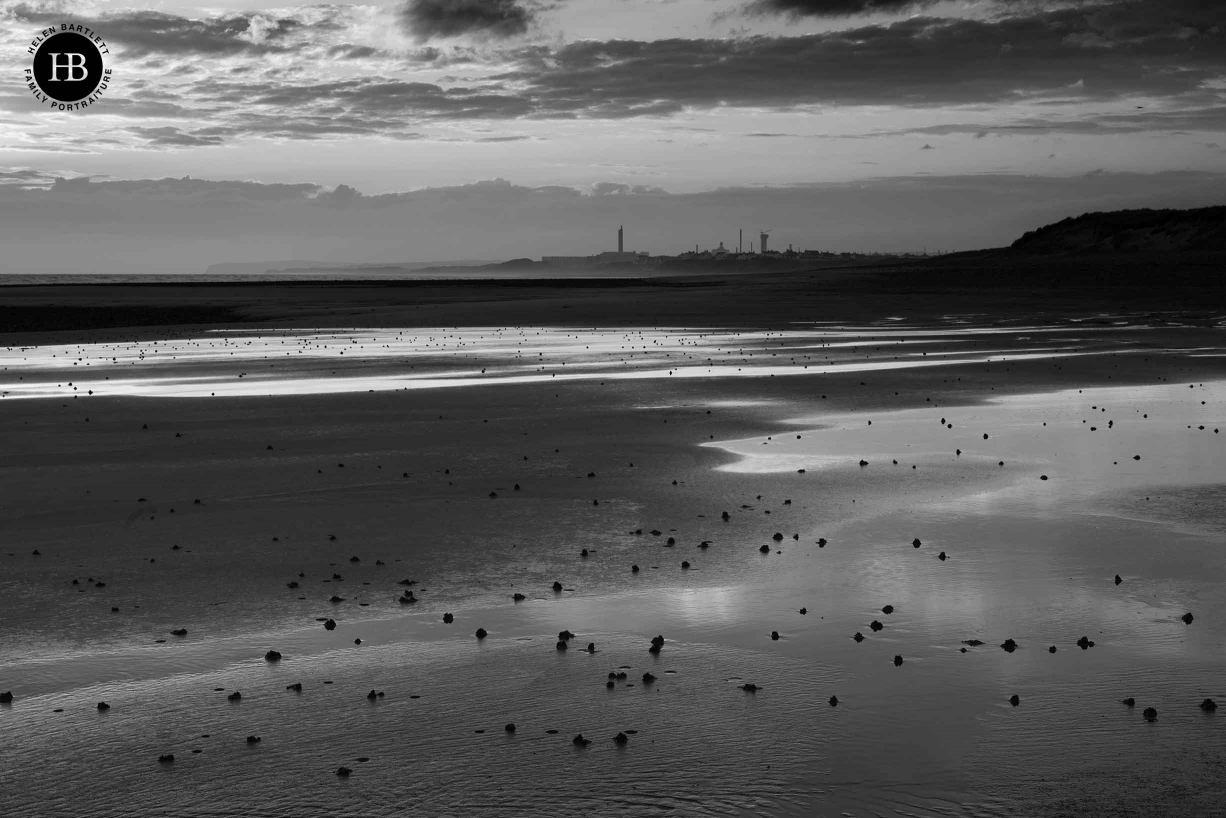
And in practice? We can use both tilt and shift separately or together. In this picture, we have used tilt to create front to back sharpness from the wood in the foreground, through the grass and to Sellafield in the back of the shot. We’ve also used shift to move the lens up, which has kept the towers of the power station straight.
I’m sure you can see why landscape and architectural photographers love tilt-shift lenses as they enable us to produce images that are closer to what we think we are seeing. If we look at a forest we don’t think of the trees converging together, if we look at a building the walls are straight. These amazing lenses mean we can create images that look perfect in camera, without the need for focus stacking or perspective correction in post-production.
But how else can we use them? With this flexibility, can we use these lenses for portraits?

We can see the difference between the image with the trees converging on the left and one where shift has been used to move the angle of view up and keep the trees straight on the right.
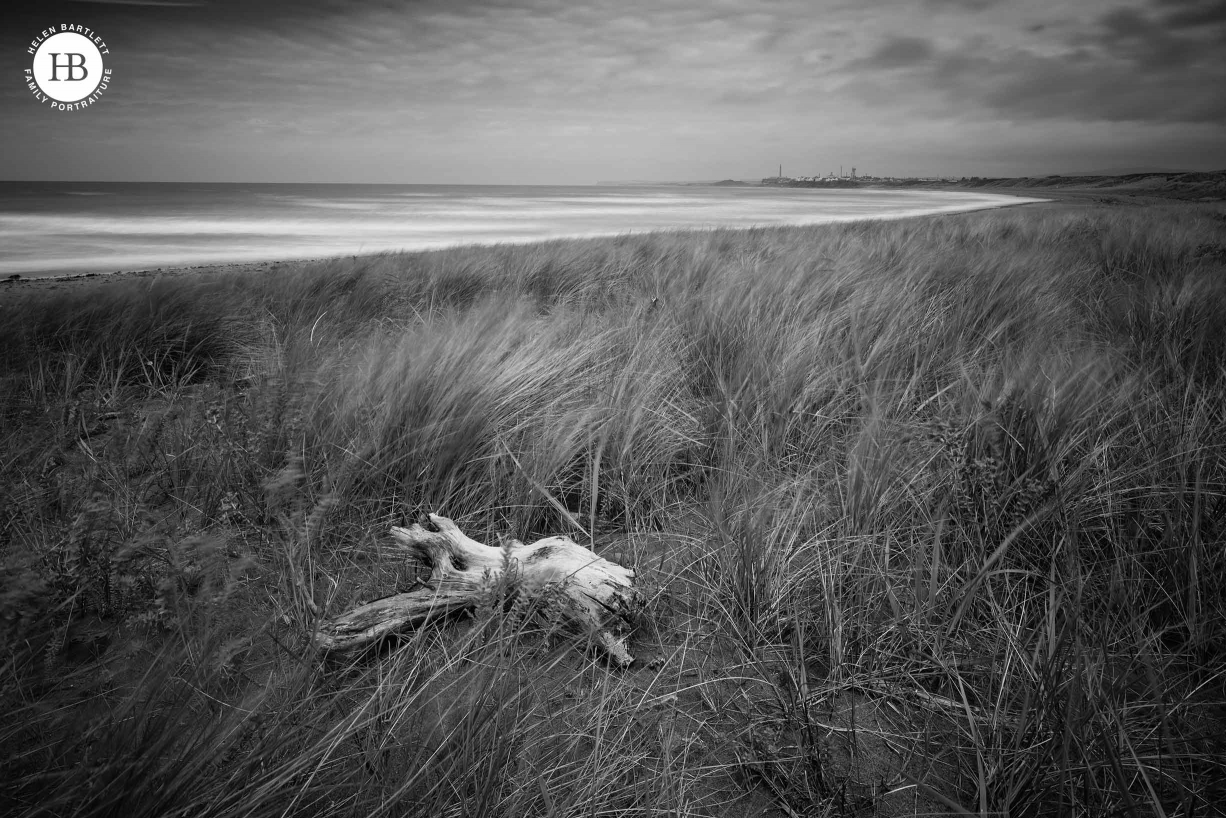
Using tilt and shift together gives us front to back sharpness and also keeps the buildings at Sellafield straight.
Using Tilt-Shift Lenses For Portraits
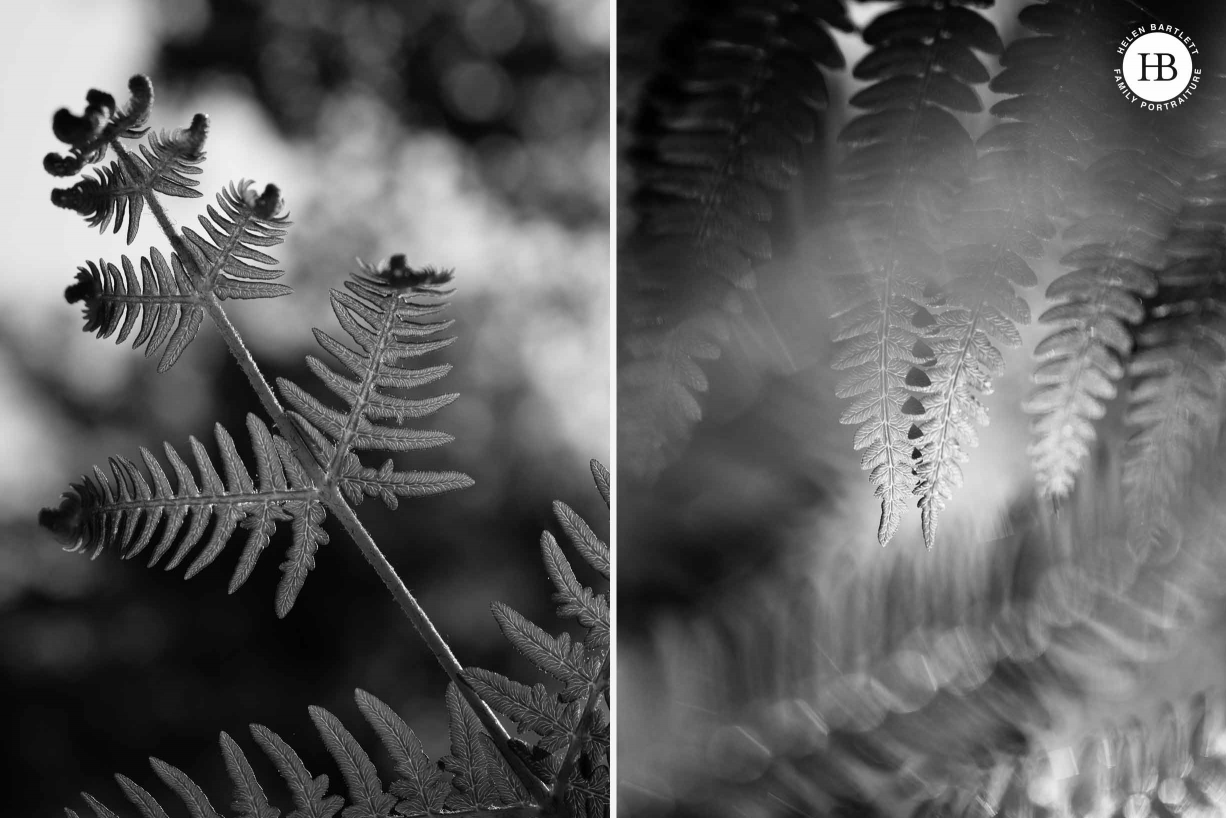
As well as using tilt-shift lenses for landscape and architectural work, creating images that look natural as our eyes see the world, they can also be used to creative visual effects. By using the mechanisms in the ‘wrong’ way we can produce interesting effects that guide our eye around an image.
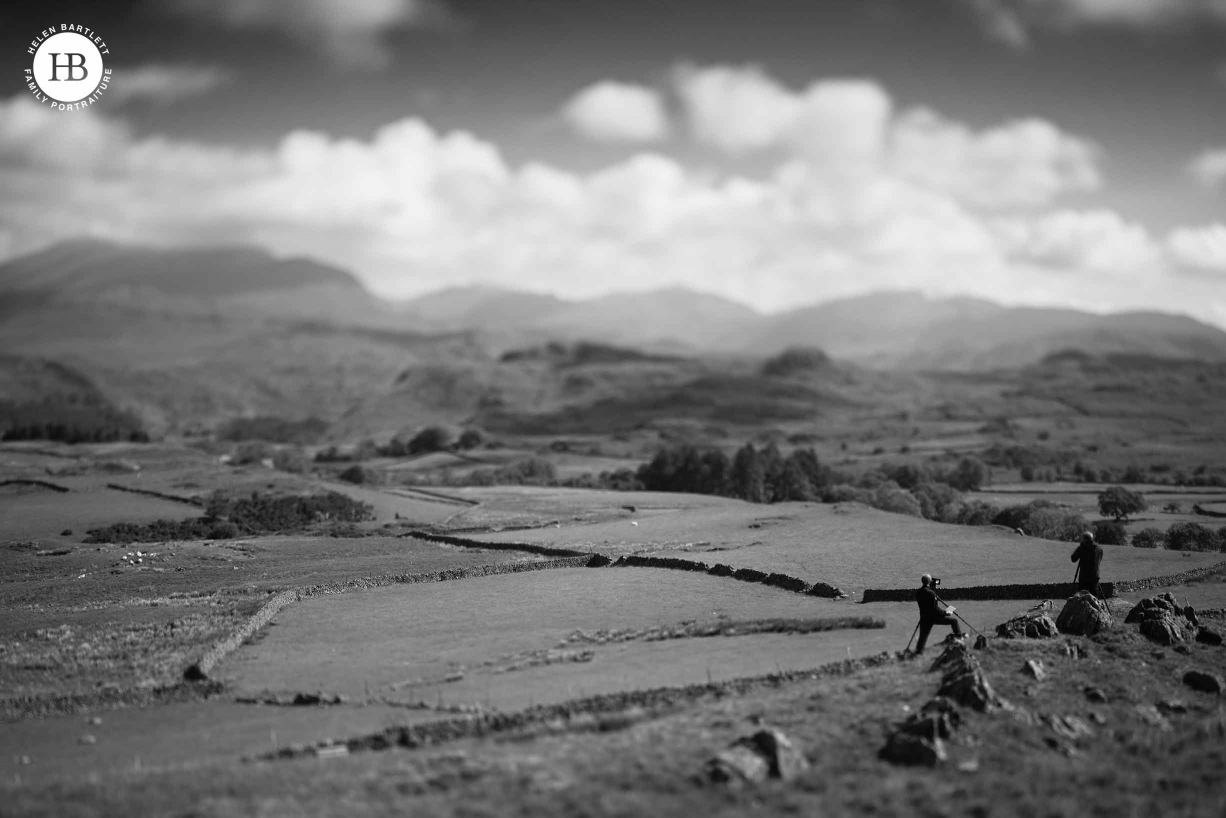
One of the most well-known incidences of this is using tilt-shift lenses to create a miniature effect such as this picture of the dressage at the London Olympics by photographer Alex Livesey (scroll down to image 49). I used this technique during our trip to take the picture below of Joe Cornish and our friend Oleg making photographs on the mountainside, and I really like the way our eye is drawn to them as figures in the landscape and not distracted by the other elements in the frame. By using a sliver of focus, I created a line through the image where the picture is sharp but with soft focus above and below. This adds a wonderful sense of mystery to a picture.
As well as my recent landscape trip, I have been beginning to experiment a little with tilt-shift lenses in my family photography work this year. It’s early stages and I’m not sure where these experiments will take me, but I’m enjoying the additional creative challenges of occasionally packing my TS-E 45mm f2.8 lens in my bag.
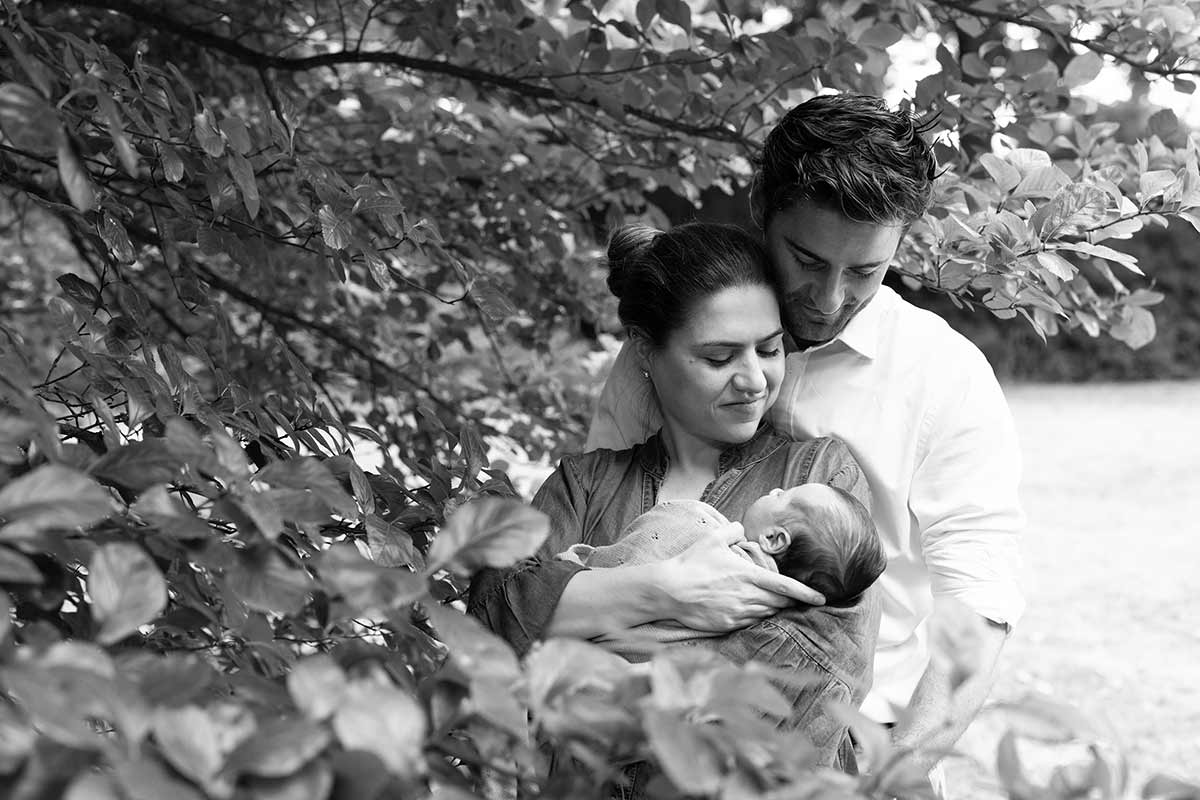
Because Canon tilt-shift lenses can be used to really home in on a point of focus within an image, we can use it to blur out unwanted information. A busy home can be bought a sense of clarity with the line of focus carefully placed to include the faces, or a parent holding their baby can have the focus pin-pointed to their expression as they look down with joy. There’s no denying that it’s difficult to use these techniques with families, though: the lenses are manual focus only, but it’s exciting too, a new area to explore.
I used the tilt-shift lens creatively to produce this image.

Selective focus can be used for emphasis, here focus on the baby and on the flowers remind us of new life in all it’s forms.

A busy home is blurred to focus our eye on the main subject of the image.

Creative use of the out of focus areas can really guide our eye around an image.
Canon Tilt-Shift Lenses and The EOS R
What has made it possible for me to even think about using tilt-shift lenses for family portraits is how well they work with the Canon EOS R. Previously on a DSLR camera, it has been a laborious task to focus these lenses manually. To use tilt effectively for front to back focus, you start with the lens set to zero tilt, focus on your immediate subject, move the focus point to the place furthest away where you want focus, add a bit of tilt, focus, come back to the front, check focus, adjust the tilt, go back, and repeat until you get it just right. It took a long time I found it very hard.
When using the lenses creatively, there were often very small areas of focus and I found it very hard imagine where the points of focus would be and even harder to see if they were in focus when looking through the viewfinder on my old EOS 30D (which was the camera I used when I first tried shooting with the TS-E 45mm f2.8 lens)
Now with a combination of the EOS R’s excellent electronic viewfinder, focus peaking, and also the handy manual focus indicator, it’s all got so much easier. Using the touch screen on the EOS R, it’s easy to tap a point, see if it’s in focus, tap, another tweak, and see quickly and clearly if you’ve successfully focussed on the areas that you want to. Zooming in is very quick, focus peaking helps you see the plane of focus, and the whole process feels instinctive, fast, fun and exciting.
What Next For Me and Canon’s Tilt-Shift Lenses
Alongside the Canon EOS R, I’m planning to spend more time with tilt-shift lenses. Sadly, I have to return the wonderful TS-E 24mm f3.5L II, TS-E 50mm f2.8L MACRO and TS-E 90mm f2.8L MACRO lenses to Canon but I still have my old TS-E 45mm f2.8 and I am considering part exchanging that for the TS-E 50 mm f2.8L MACRO which has the advantage of a macro facility as well as being easier to use with much bigger dials (which makes all the difference when your hands are cold).
How much I will use it remains to be seen but I think that a tilt-shift lens will start to be a regular feature of my camera bag for newborn shoots and we will see how that goes for a while. I’m also hoping to do more landscape photography as I had forgotten how fulfilling I find it and how much fun I have taking pictures in a completely different genre.
It’s fun to experiment, it’s fun to play, and it’s fun to be creative. This is what makes this career such a joy and something which can get forgotten in the day-to-day work of running a business. Trying new equipment, playing with new lenses, finding new ways to approach a subject, and learning a new visual language: these are why photography is full of opportunities and why we, as photographers, should take advantage of all the tools that are available for the sheer joy of having fun and creating something new.